

Adding Your First Patient
Before your first real patient, add a test patient, for example named Test Patient. You can book appointments, write charts and make invoices for a test patient while you learn, without touching anyone’s real record.
You add patients from the Patients page. You can also add a new patient while booking an appointment; see Booking Events.
Opening the Patients Page
Open the Main Navigation Menu, at the top left of the screen, and click Patients. The Master Client List opens. It lists all your patients, across all your offices.
Adding a Patient
- Click +New, beside Master Client List at the top of the page. The Create New Client Record panel opens.
- Enter the patient’s First Name and Last Name. Both are required.
- Fill in as much of the rest as you have: Preferred Name, Preferred Pronoun, Date Of Birth (written as year, month and day, such as 1985-04-12), Gender, Occupation, the Mobile, Home and Work Phone numbers, and the Email Address.
- Click one of the two buttons at the bottom:
- + Quick Add adds the patient and keeps you on the list, ready to add the next one.
- + Create Profile adds the patient and opens their Client Workspace, where you can see and add everything about them.
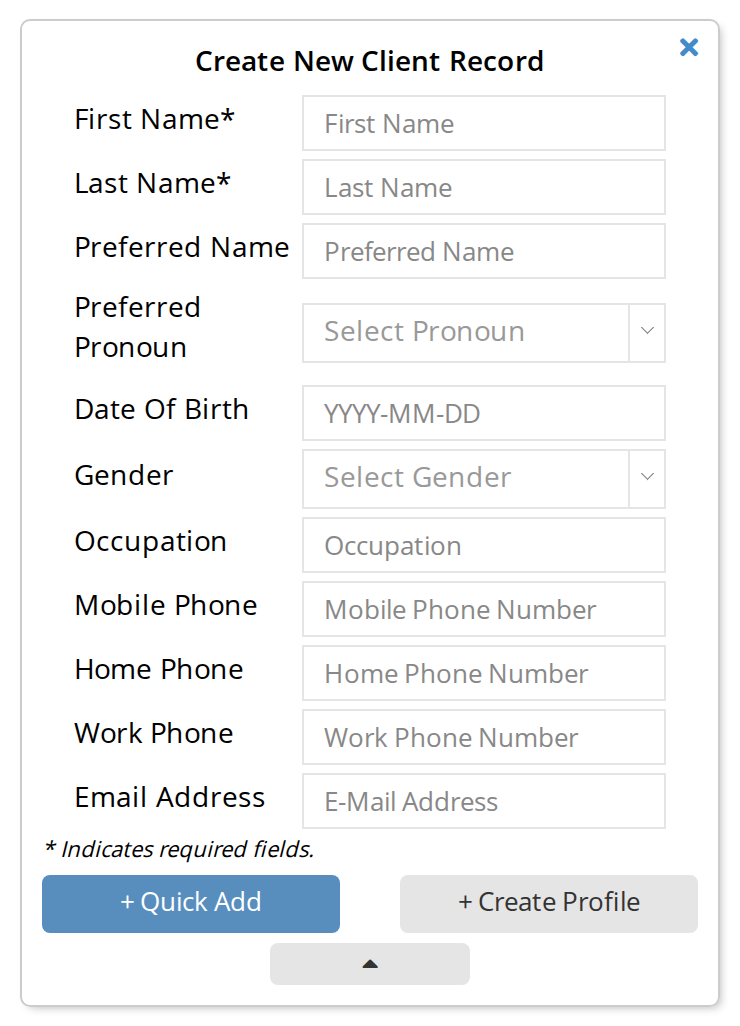
The Create New Client Record panel. Only the first and last name are required.
What Next
Book an appointment for your test patient, then chart it:
- Booking Events: booking an appointment on the calendar.
- Creating A New Chart: writing a chart for the visit.
- Client Workspace Overview: everything on a patient’s workspace.
If you are bringing a patient list from another system, import it instead of adding patients one by one. See Importing Patient Demographic Data.
Related Pages
- Getting Started With OutSmart: every first step, in order.
- Merging Duplicate Patient Records: when a patient has been added twice.