

Shipping or Pickup: the Ready Step
When the dispensary staff mark an order as packed, it moves to the Ready step. This page explains the last part of the work: either shipping the order and emailing the client the tracking details, or telling the client that the order is ready to be picked up and recording when they collect it.
Only the dispensary staff can do this, meaning the dispensary owner and the staff who have full access to the dispensary. Fulfilling an Order explains the steps before Ready.
The Ready Card
When an order is at Ready, its printout opens with a card at the top. You use this card to ship the order or to hand it over.
At the top left of the card are two tabs, Ship it and Pickup. The card opens on the tab that matches what the client chose for the order. At the top right, a label tells you what that choice was, for example The client chose: Ship to me or The client chose: Pick up at the clinic.
Shipping an Order
Click the Ship it tab, if it is not already selected.
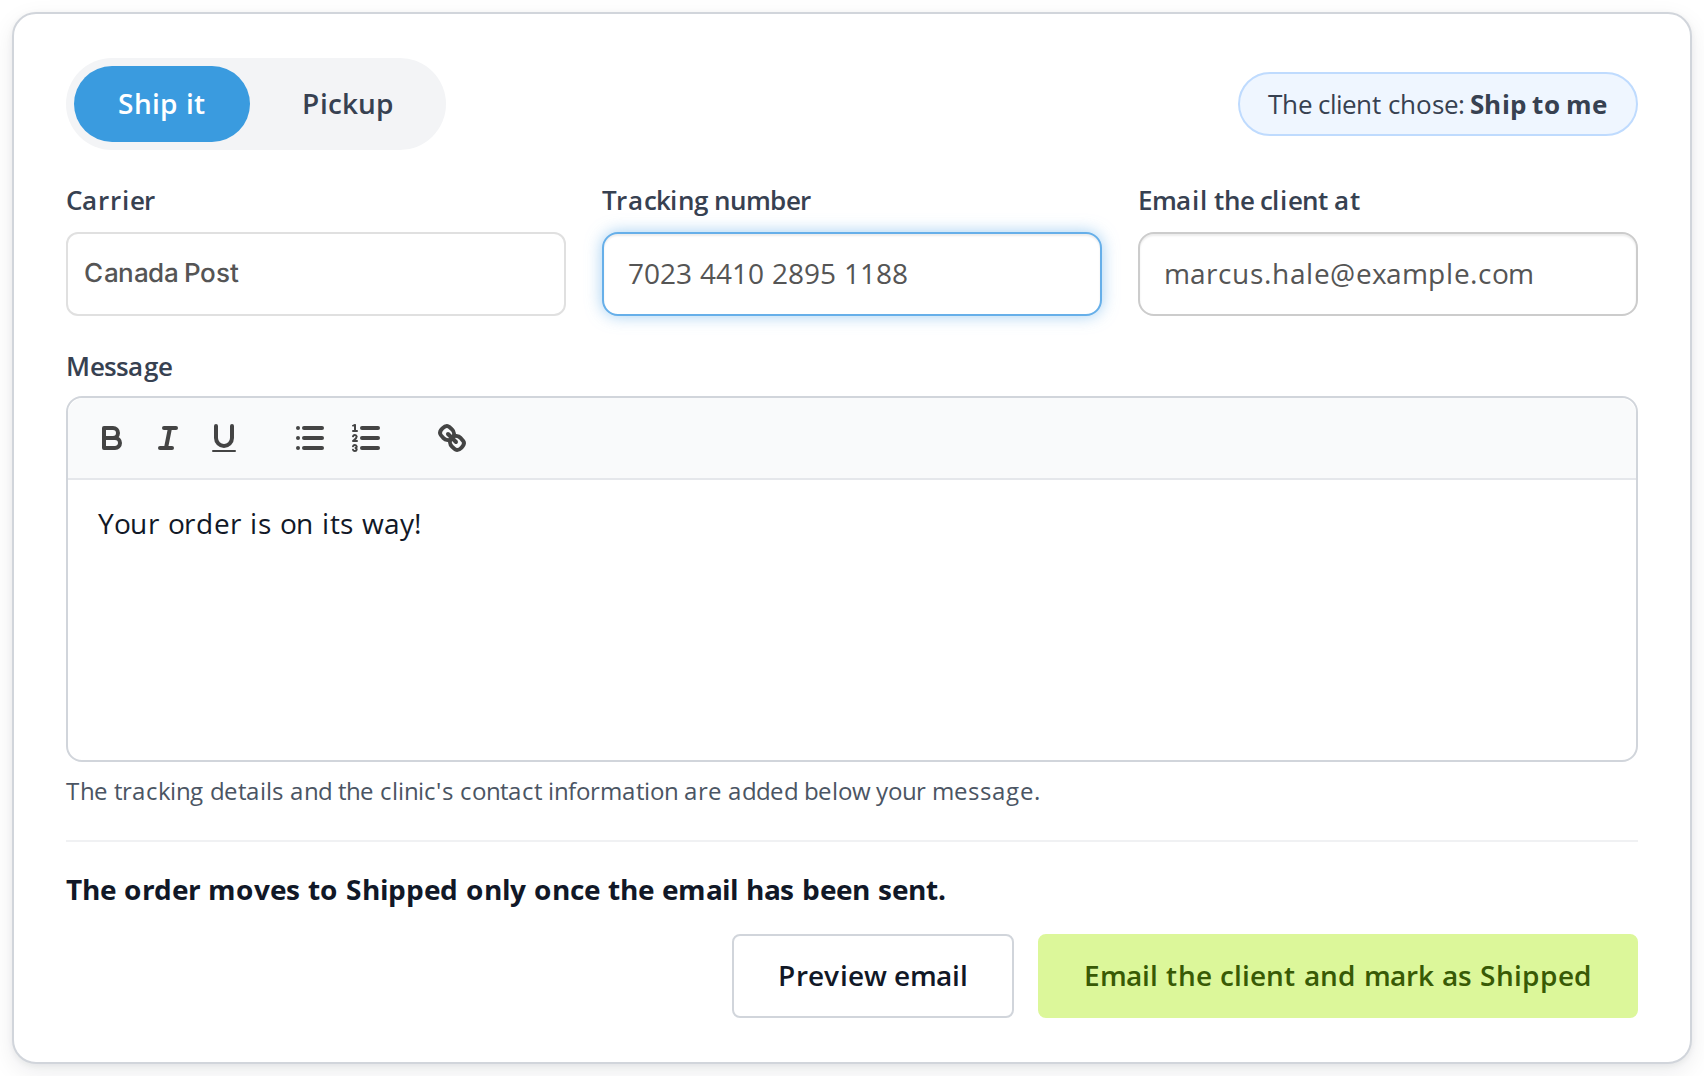
The Ship it tab of the Ready card, filled in. The carrier and tracking number go into the email, and the order moves to Shipped once you send it.
- In Carrier, choose the company that is delivering the order.
- In Tracking number, type or paste the tracking number the carrier gave you.
- Check the address in Email the client at. It comes from the order, and you can change it for this email.
- Check the Message. It starts as Your order is on its way!, and you can change it or add to it. The tracking details and the office’s contact details are added below your message.
- Click Preview email to see the email exactly as the client will receive it. This step is optional.
- Click Email the client and mark as Shipped.
The client is emailed, and the order moves to Shipped. The order only moves to Shipped once the email has been sent, so if the email cannot be sent, the order stays at Ready.
The carrier list
The Carrier list shows the carriers your dispensary has set up. The last item in the list is Customize this list…. Choosing it opens a window that explains where the list is kept.
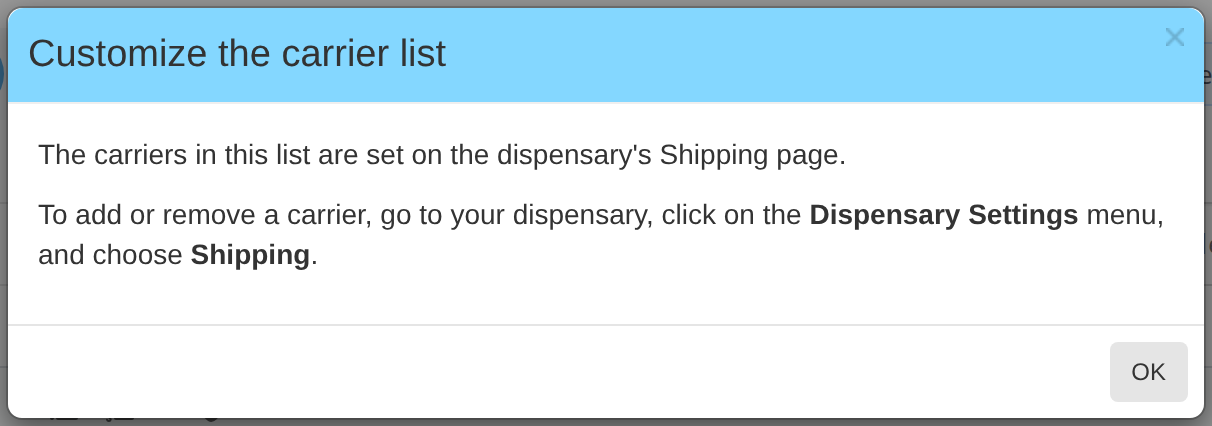
The window that opens when you choose Customize this list at the bottom of the Carrier list. The carriers are set on the dispensary's Shipping page.
To add or remove a carrier, open your dispensary, click Dispensary Settings in the menu along the top, and choose Shipping. Shipping Carriers explains that page, including how to add your own courier with a tracking link.
Previewing the email
Preview email opens a window with the email the client will receive. The top of the window shows who the email is from, who it is to, its subject, and the PDF of the invoice that is attached to it.
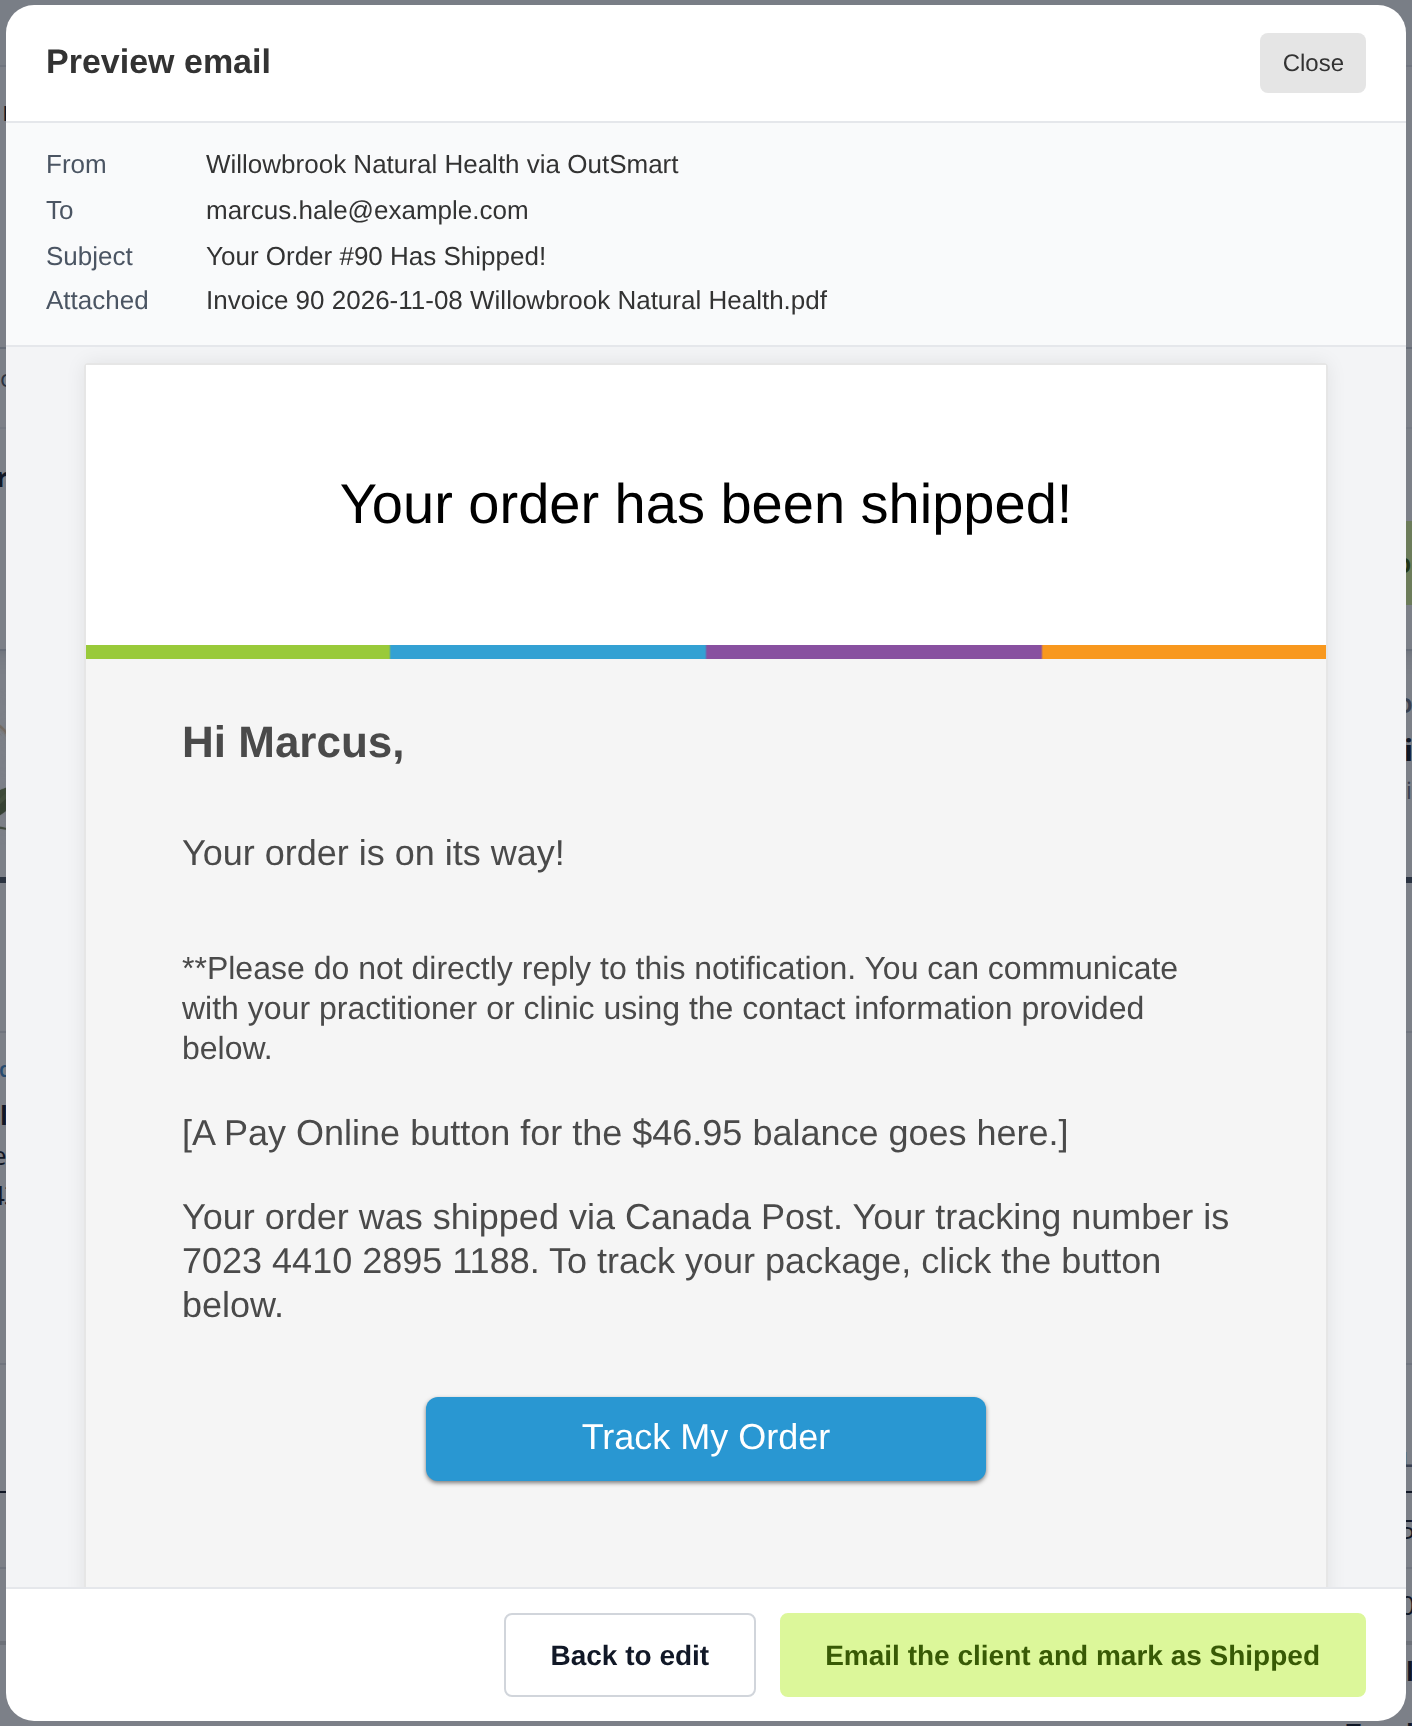
The preview of a shipping email. It comes from the office the order was placed at, and it includes the carrier, the tracking number and a Track My Order button.
The shipping email includes:
- your message;
- when the order still has a balance owing and your dispensary includes the payment button in its emails, a Pay Online button so the client can pay the balance by card (the preview shows a note in its place);
- the carrier, the tracking number and a Track My Order button, which opens the carrier’s tracking for the parcel, or the carrier’s tracking page where the client enters the number;
- the office’s contact details;
- the invoice as a PDF attachment.
Click Back to edit to change the email, or Email the client and mark as Shipped to send it straight from the preview.
Having the Client Pick Up the Order
Click the Pickup tab, if it is not already selected.
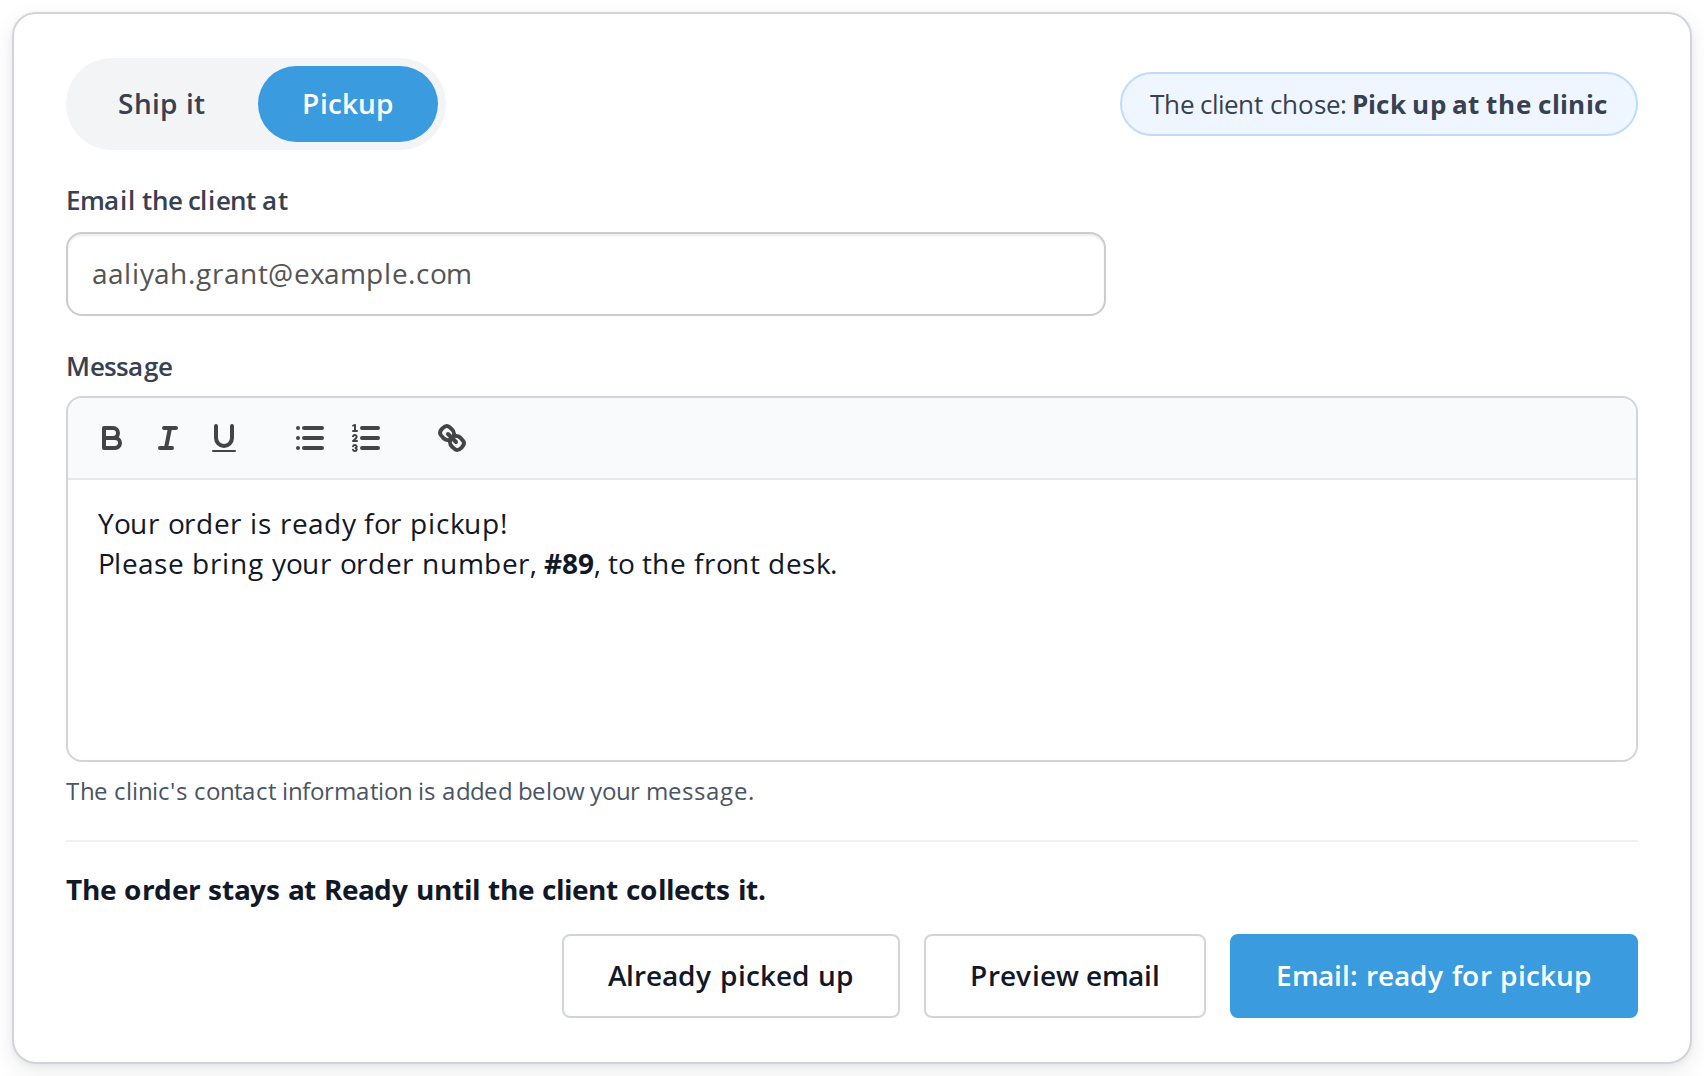
The Pickup tab of the Ready card. Email the client that the order is ready, or click Already picked up when the client has collected it already.
- Check the address in Email the client at.
- Check the Message. It starts by telling the client the order is ready and asking them to bring the order number to the front desk. The office’s contact details are added below your message.
- Click Preview email to see the email first, if you would like to.
- Click Email: ready for pickup.
The client is emailed. The order stays at Ready until the client collects it, because it has not left the clinic yet. The card now shows when the client was told, who told them, and the address the email went to.
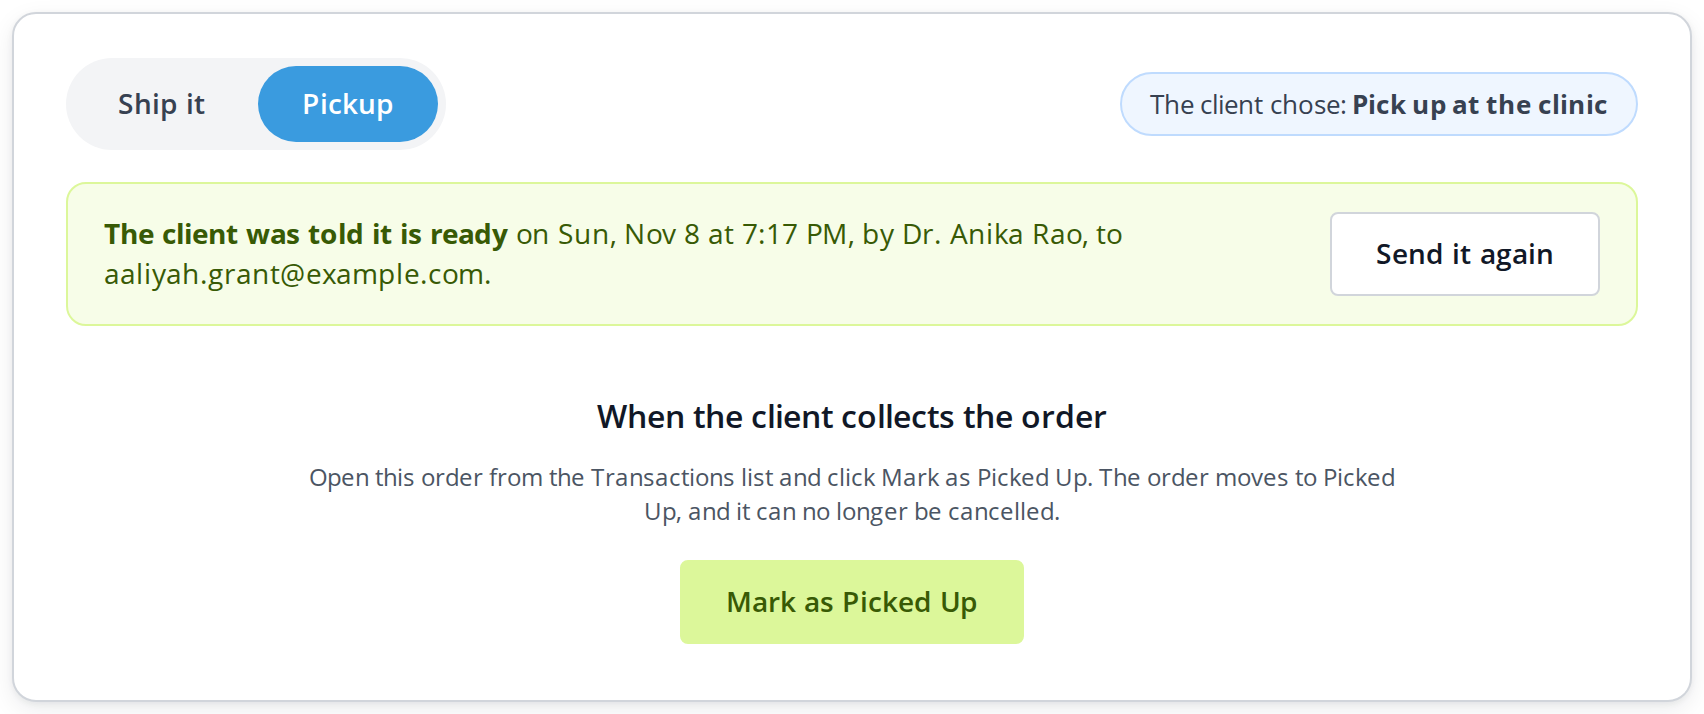
The Ready card after the client was told the order is ready. Send it again repeats the email. Mark as Picked Up is for when the client collects the order.
To email the client again, click Send it again.
When the client collects the order
Open the order from the Transactions list and click Mark as Picked Up. A window asks you to confirm, because once the order is picked up it can no longer be cancelled.
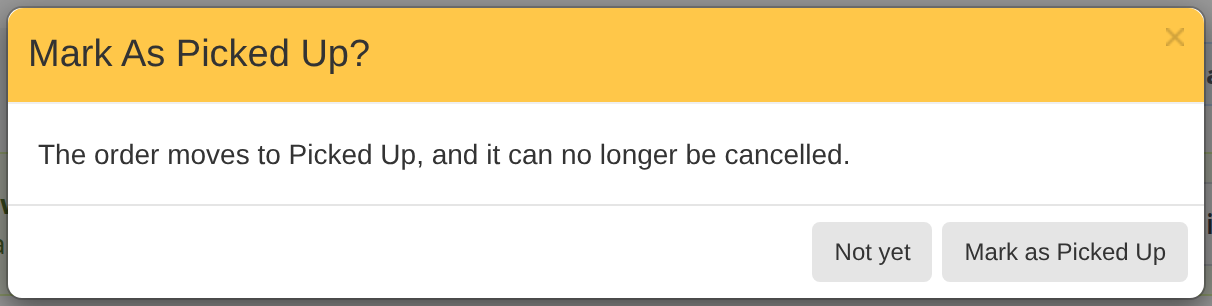
The window that confirms the client has collected the order. Not yet leaves the order at Ready.
Click Mark as Picked Up. The order moves to Picked Up, which is its last step. No email is sent at this point.
When the client collects an order before you have emailed them, click Already picked up on the Pickup tab instead. The same window opens, and the order moves to Picked Up without an email.
When the Client Chose Pickup but the Order Needs Shipping
Sometimes an order that the client chose to pick up has to be shipped instead. When you click the Ship it tab on such an order, a yellow box explains your two choices, because the order has no shipping address and no shipping charge on it.
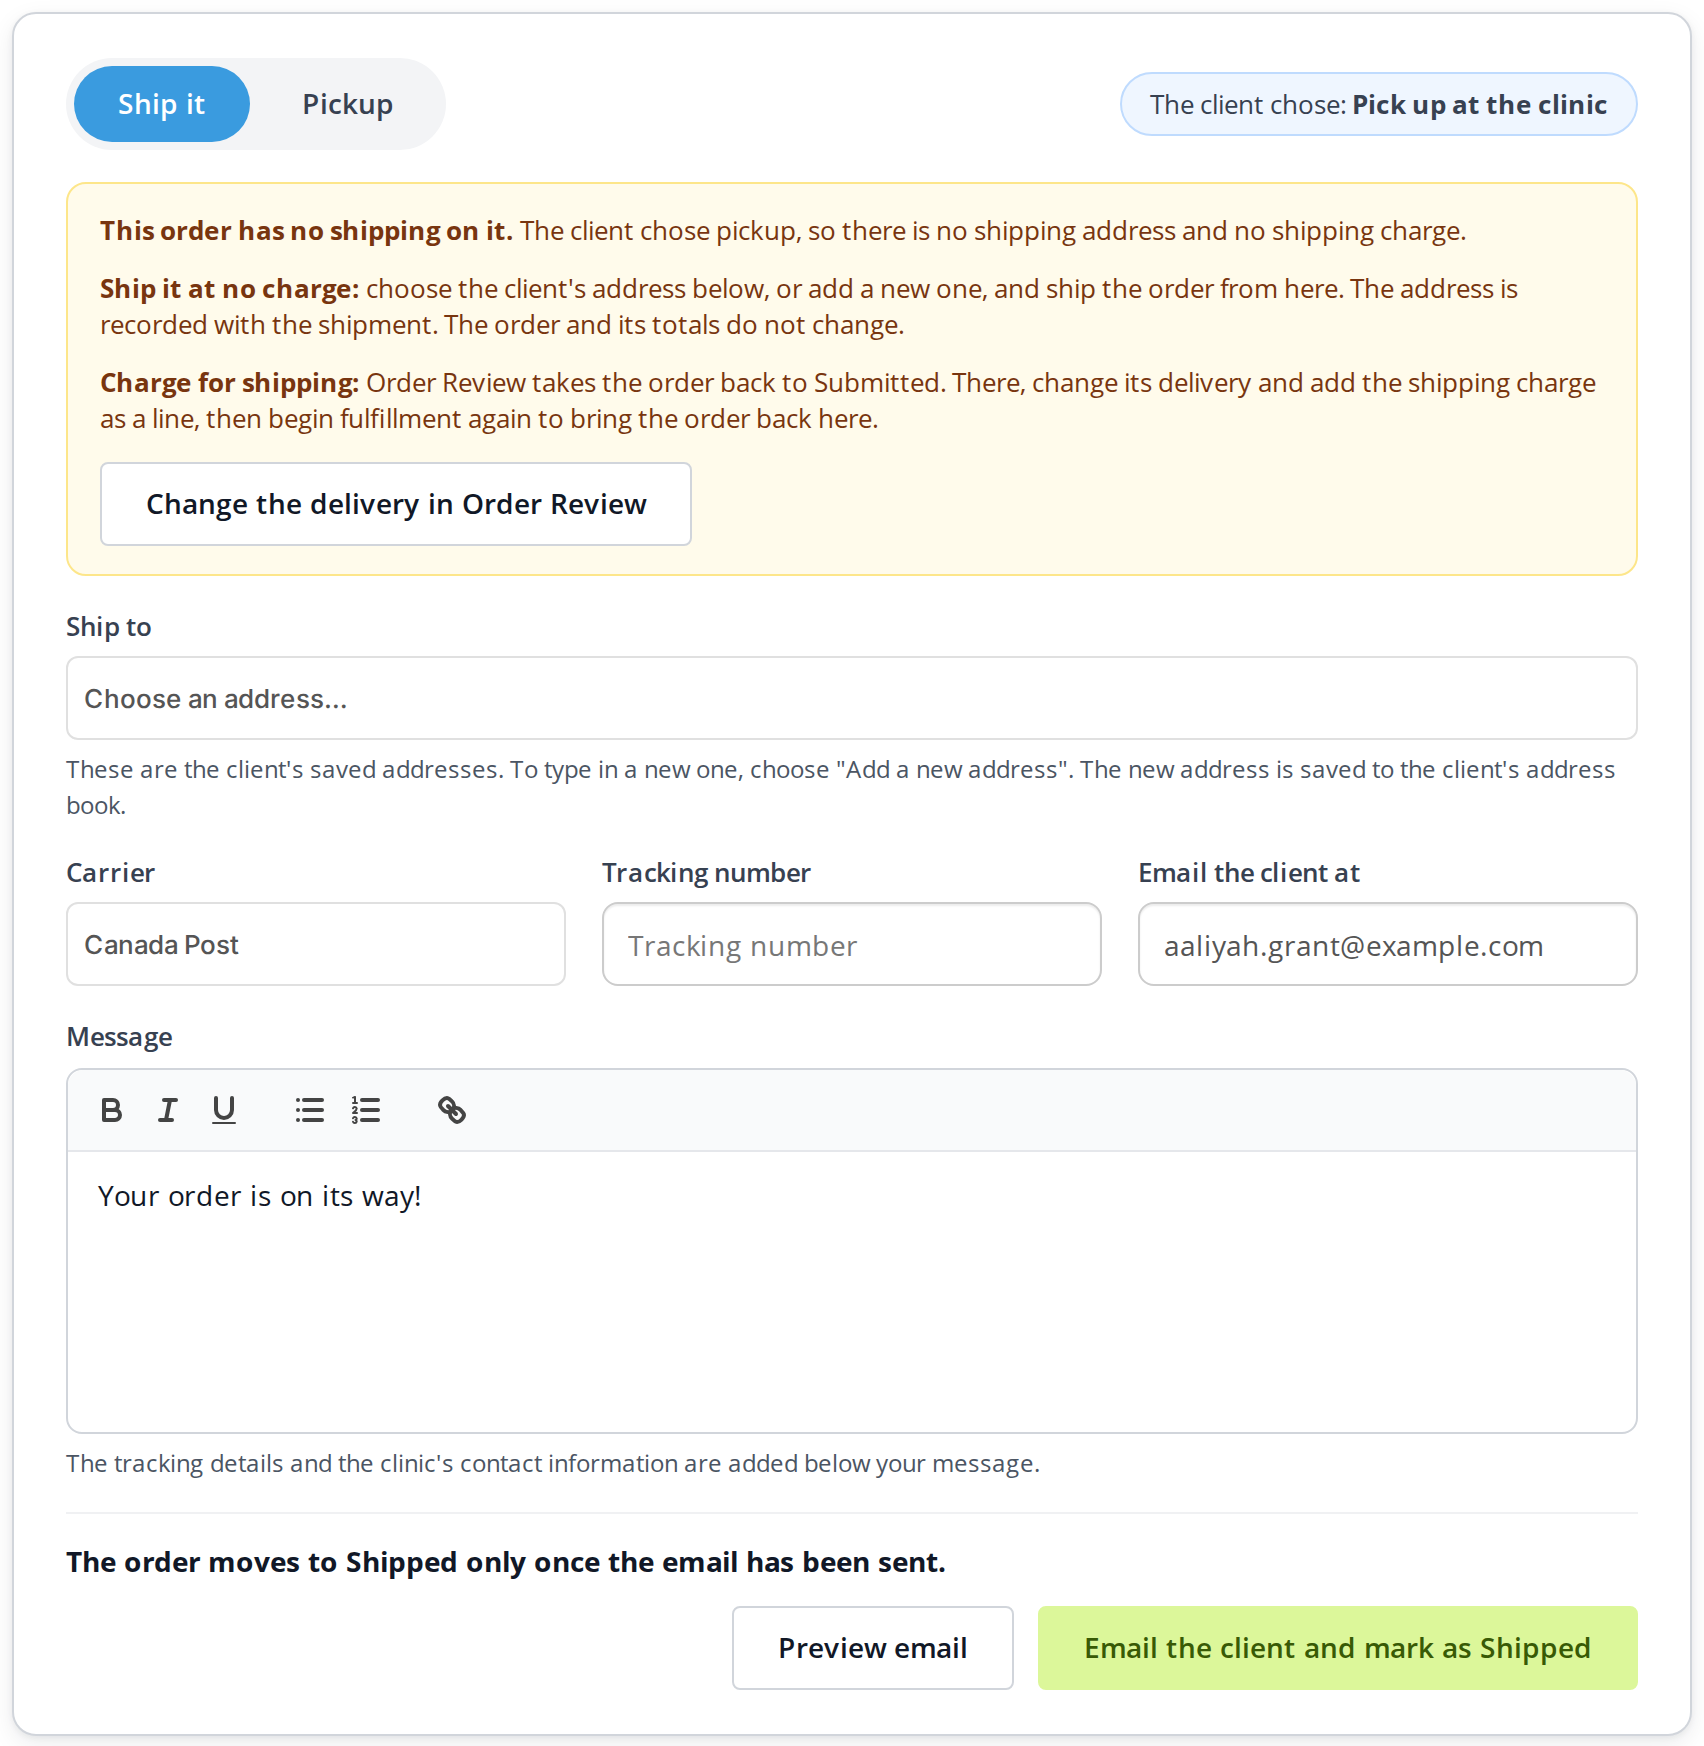
Shipping an order whose client chose pickup. Ship it at no charge from here, or take the order back to add a shipping charge.
- Ship it at no charge. Choose the client’s address in Ship to, or choose Add a new address to type in a new one, which is also saved to the client’s address book. Then fill in the carrier and tracking number and ship the order as usual. The address is recorded with the shipment, and the order and its totals do not change.
- Charge for shipping. Click Change the delivery in Order Review. The order goes back to Submitted and opens in the order screen. Change the delivery to shipping, add the shipping charge as a line, and save. Then begin fulfilling the order again to bring it back to Ready.
After the Order Is Shipped or Picked Up
The order’s step bar shows Shipped or Picked Up as its last step, and the Fulfillment column of the Transactions list shows the same.

The step bar of a shipped order. The Ready dot is outlined in blue, so the order can be taken back to Ready if it was marked by mistake.
If an order was marked as shipped or picked up by mistake, click the Ready dot on the step bar. The order goes back to Ready, and you can ship it or hand it over again.
Troubleshooting
The carrier I need is not in the list
The carriers come from the dispensary’s Shipping page, under Dispensary Settings. Add the carrier there, then come back to the order. Shipping Carriers explains how.
The order did not move to Shipped
The order only moves to Shipped once the shipping email has been sent. Check the address in Email the client at, then click Email the client and mark as Shipped again.
The client did not receive the email
Check the address in Email the client at on the Ready card. After a pickup email, the card shows the address it was sent to, and Send it again repeats it. To correct the client’s email address, update it on the patient’s record, then click Update beside Client on the order’s printout.
Related Pages
- Fulfilling an Order: the steps before Ready, and taking an order back a step.
- Shipping Carriers: the carriers in the Carrier list, and your own couriers.
- Orders: every step of an order and the emails the client receives.
- Notes and Activity on an Order: the record of everything that happened to an order.
- Cancelling an Order: why an order cannot be cancelled once it is shipped or picked up.