

Initial Dispensary Configuration
Before you sell from a new dispensary, set up four things: the taxes you charge, the tax groups your products use, the categories you sort your products into, and the dispensary’s address. This page walks you through each one, in the order to do them.
All four are set up inside the dispensary. To open it, click the purple menu icon at the top left of any page to open the Main Navigation menu, click Dispensary, then click the name of your dispensary.
Step 1: Tax Rates
A tax rate is one tax, such as GST at 5% or PST at 7%. Set up one tax rate for each tax you charge.
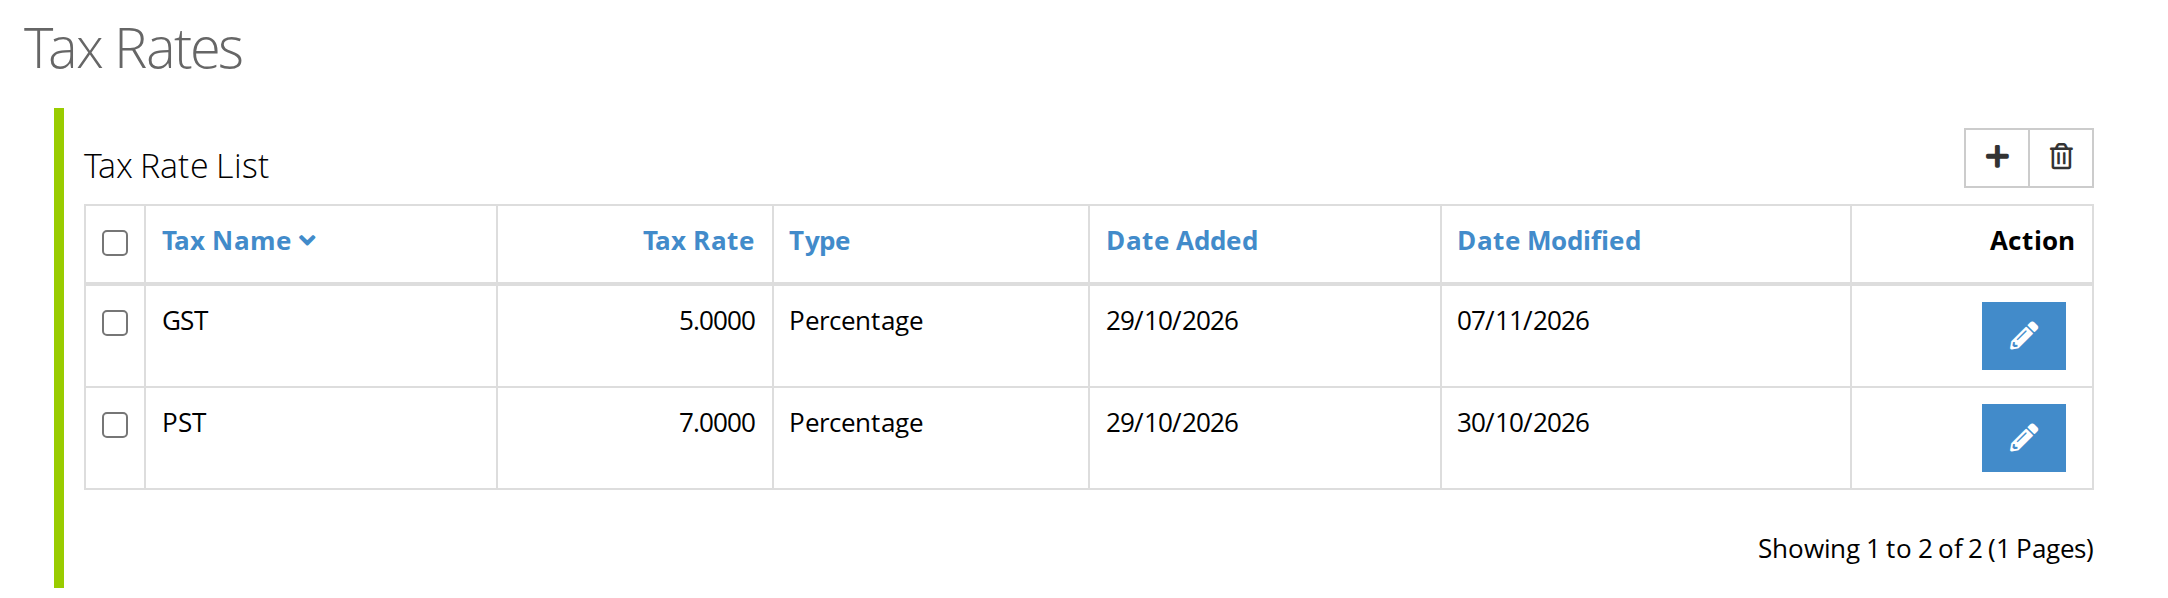
The Tax Rates page, with one rate for each tax.
- Click Dispensary Settings in the menu along the top of the dispensary, then click Tax Rates.
- Click the plus button at the top right to add a tax rate. To change an existing one, click the blue pencil button at the end of its row.
- Fill in the form, which is explained below.
- Click the save button, the disk icon at the top right of the form.
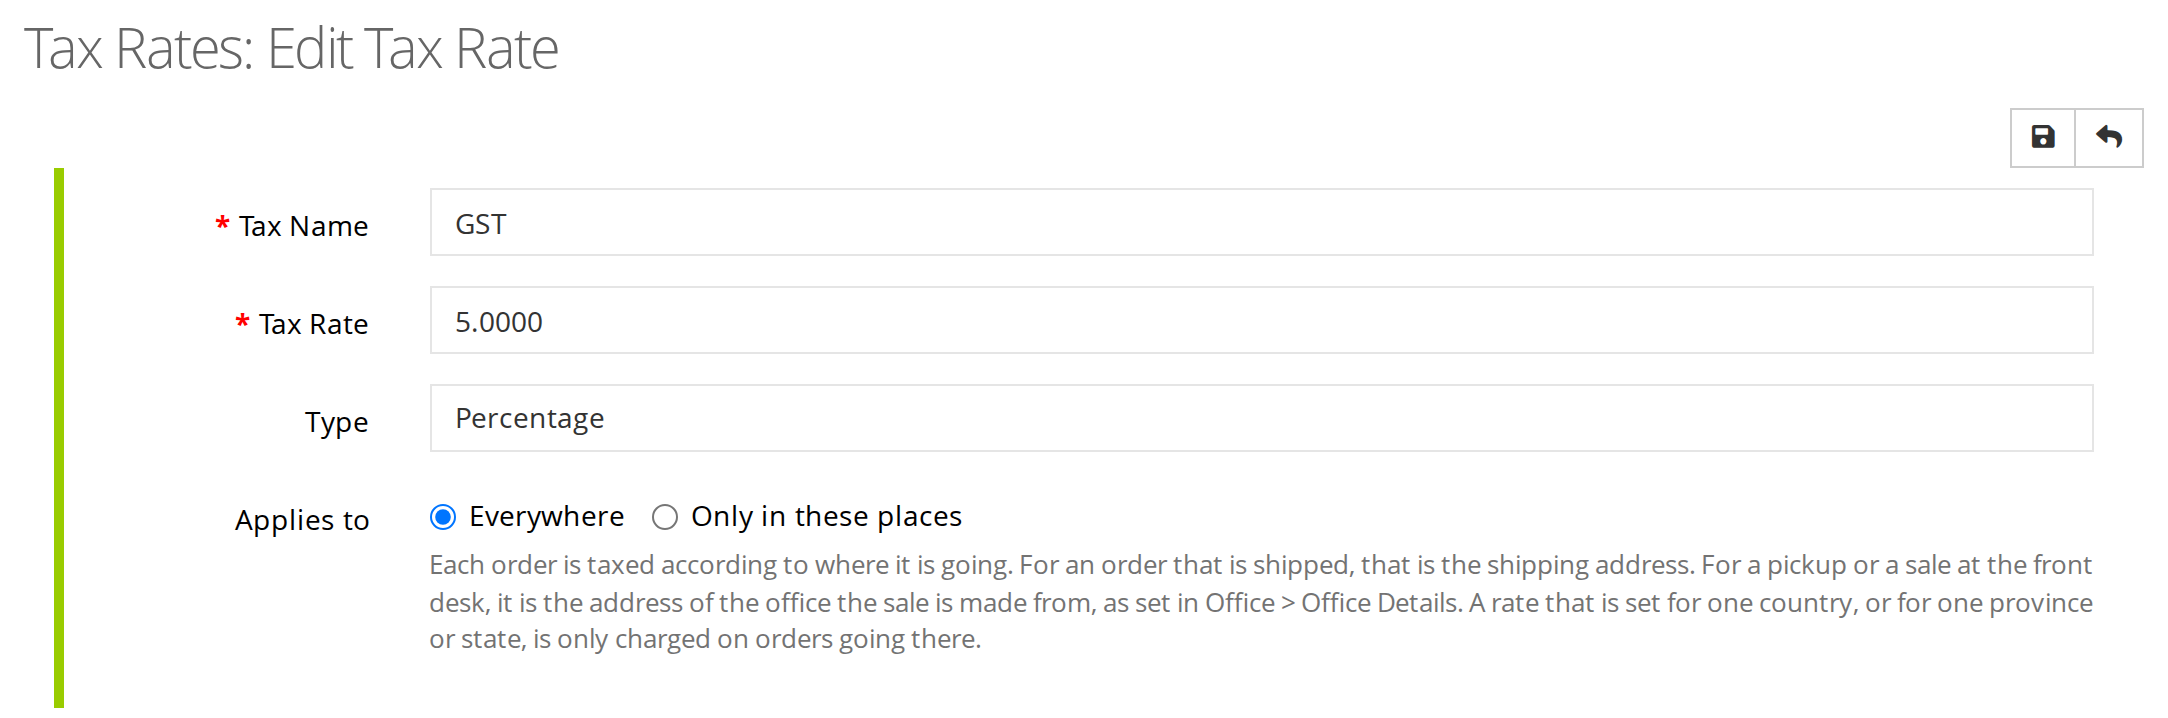
A tax rate charged everywhere, such as a federal tax.
| Field | What to enter |
|---|---|
| Tax Name | The tax’s name as you want it on invoices, such as GST. It must be 3 to 32 characters. You can add your tax registration number, such as GST 123456789, if it fits. |
| Tax Rate | The rate, such as 5 for 5%. |
| Type | Percentage for a percentage of the price, which is almost always the right choice, or Fixed Amount for an amount of money. |
| Applies to | Everywhere, or Only in these places. This is explained below. |
Where a tax rate applies
Some taxes are charged everywhere you sell, such as a federal tax. Others are charged only in one province or state, such as a provincial sales tax. Applies to tells OutSmart which kind each rate is.
- Everywhere charges the tax on every sale. Choose it for a federal tax, or when every client is in the same place as your clinic.
- Only in these places charges the tax only on sales going to the places you list.
Each sale is taxed according to where it is going:
- A sale at the front desk, or an order picked up at the clinic, is taxed at the address of the office the sale is made from. This is the address in Office > Office Details.
- An order that is shipped is taxed at its shipping address.
For example, a clinic in British Columbia sets GST to Everywhere and PST to Only in these places, with British Columbia as the place. Sales at the front desk are charged GST and PST. An order shipped to Alberta is charged GST only.
To set the places:
- Choose Only in these places.
- Choose a country. Then choose a province or state, or The whole country.
- To add another place, click Add a place. To remove one, click Remove beside it.
- Click the save button.
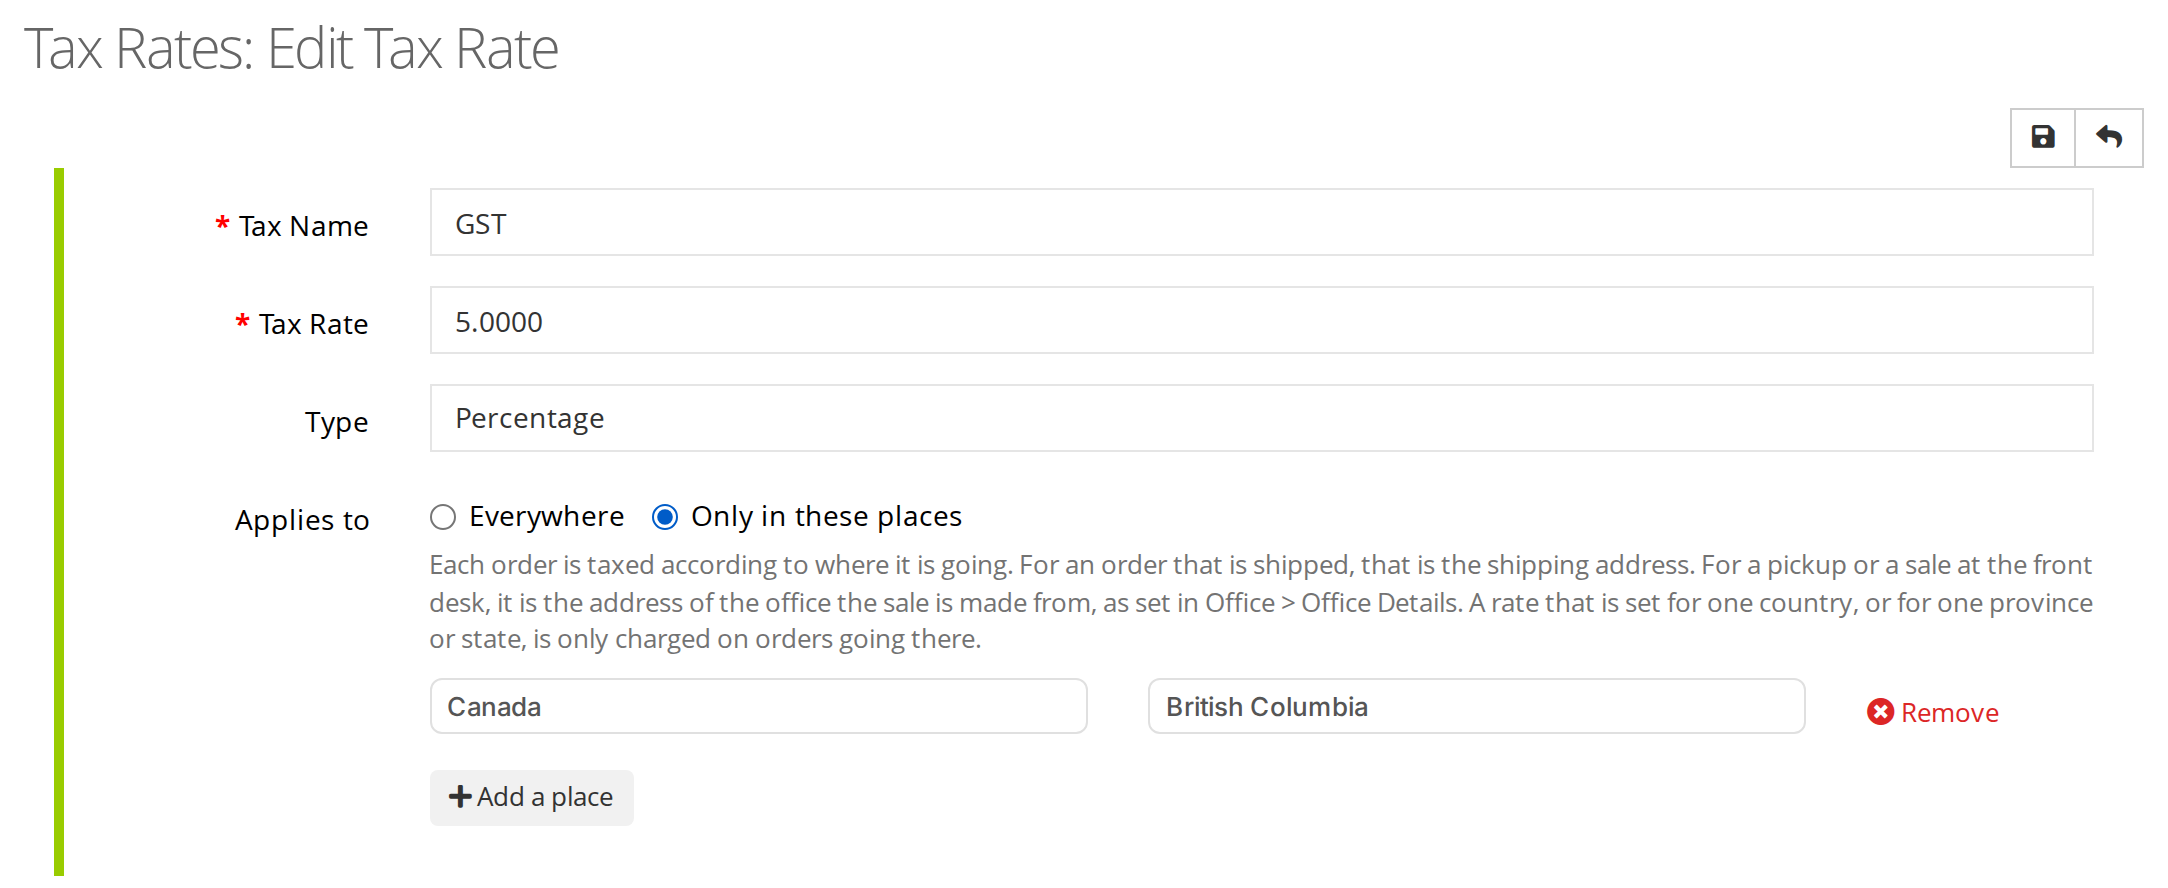
A tax rate charged only on sales going to British Columbia, such as BC's provincial sales tax.
Step 2: Tax Groups
A tax group is the set of taxes charged on a product, such as GST + PST for most products, or GST only for products exempt from provincial tax. Each product in your product list has one tax group. On an invoice, it is the TAX GROUP column.
- Click Dispensary Settings, then click Tax Groups.
- Click the plus button at the top right to add a tax group, or the blue pencil button on a row to change one.
- Type a Tax Group Title, such as GST + PST, and a Description. Both are required.
- Add each tax rate in the group. Click the blue plus button to add a row, choose the Tax Rate, and type a Priority, which is the order the taxes are listed in: 1 first, then 2.
- Click the save button at the top right.
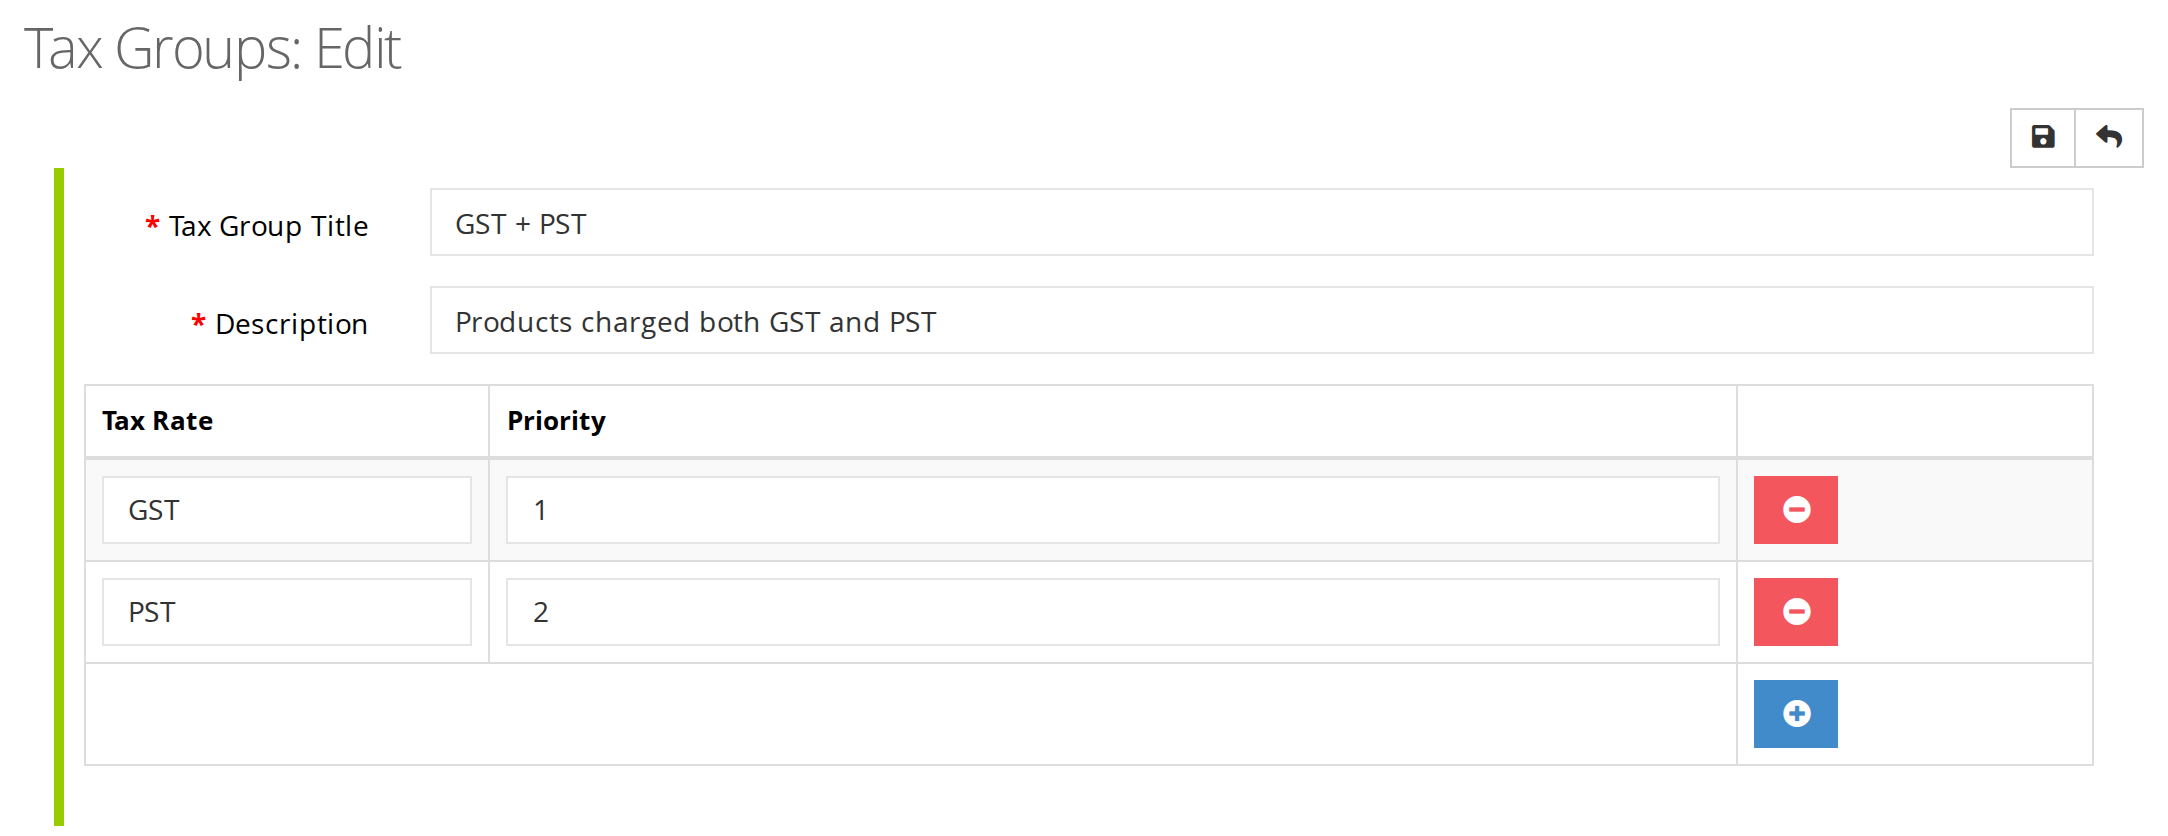
A tax group with two tax rates. The blue plus button adds a rate, and the red minus button removes one.
To remove a tax rate from the group, click the red minus button on its row, then save.
A product with no tax group is not charged tax. On an invoice, it shows --- NONE --- in the TAX GROUP column.
Step 3: Product Categories
Categories sort your products and services, for example Supplements, IV Blends and Lab Tests. Your sales reports can be totalled by category, and promotions can be limited to a category, so plan your categories around how you want to see your income.
- Click Products in the menu along the top of the dispensary, then click Categories.
- Click the plus button at the top right to add a category, or the blue pencil button on a row to change one.
- Fill in the form, and click Save.
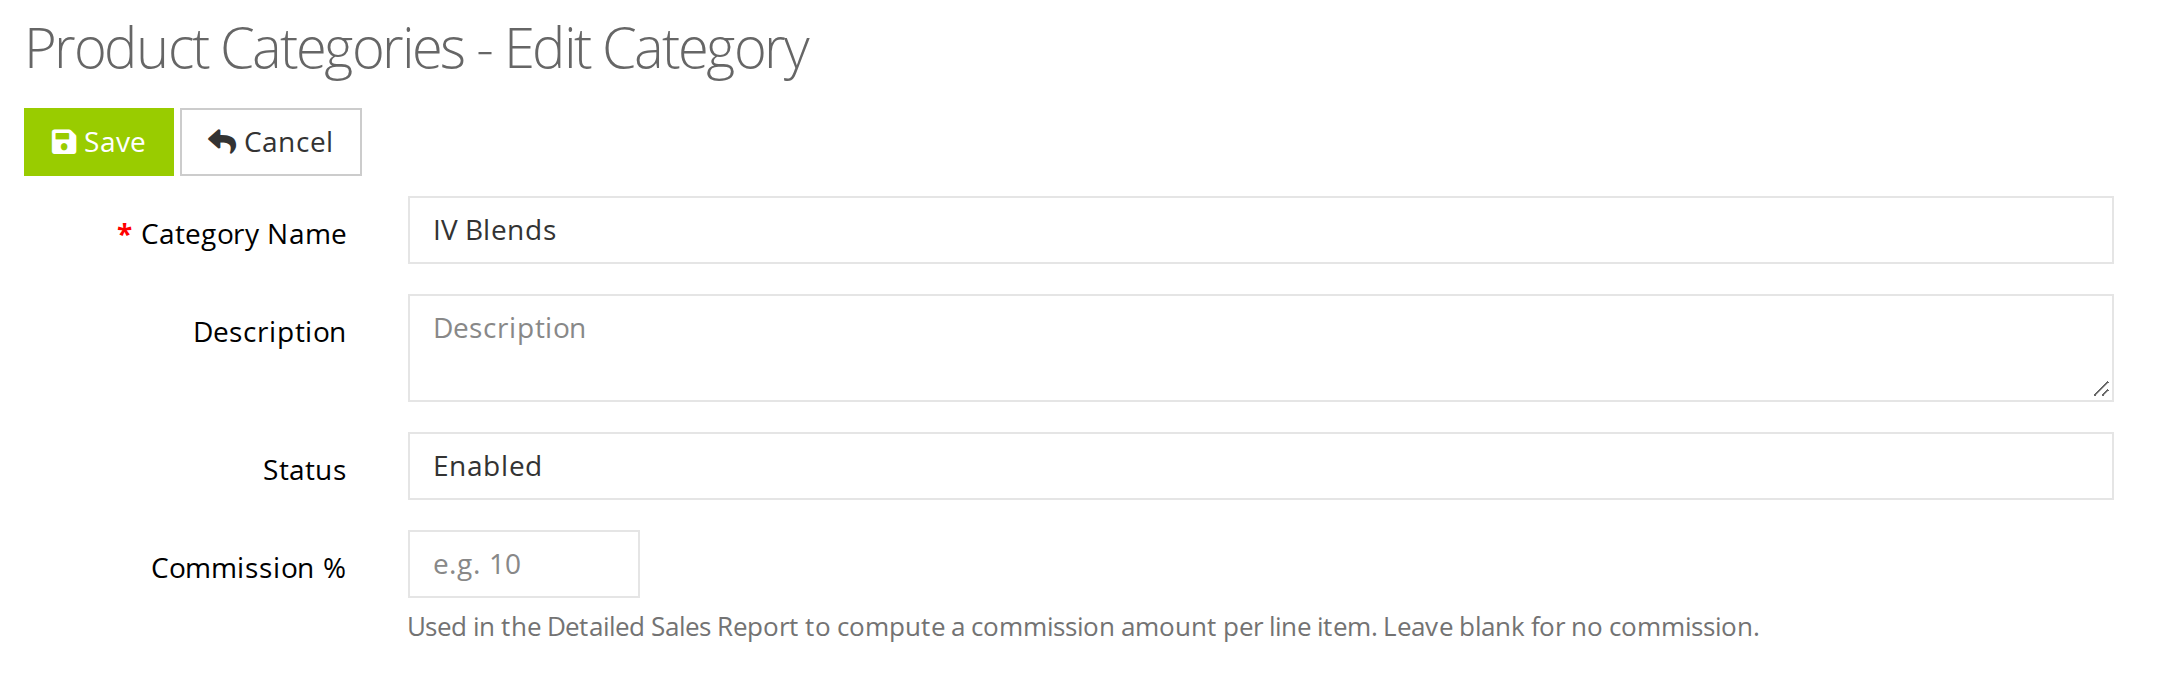
A product category. Commission % is optional.
| Field | What to enter |
|---|---|
| Category Name | The category’s name. This field is required. |
| Description | A note about what belongs in the category. It is optional. |
| Status | Enabled for a category in use, or Disabled to stop using it. |
| Commission % | The commission paid on sales in this category, such as 10, if you pay practitioners a commission. Leave it empty for no commission. Sales Reports explains the commission columns of the Detailed Sales report. |
Step 4: The Dispensary’s Address
The dispensary’s address is printed on the purchase orders you send to suppliers, as the address to deliver to. Set it before you create your first purchase order.
- Click Dispensary Settings, then click Address Book.
- Click Add Address. The address form opens.
- Fill in every field marked with a red asterisk: Address 1, City, Zip / Postal Code, Country and State / Province. Choose the country before the province or state.
- Select Default Address to use this address on every purchase order.
- Click the green Save button at the top.
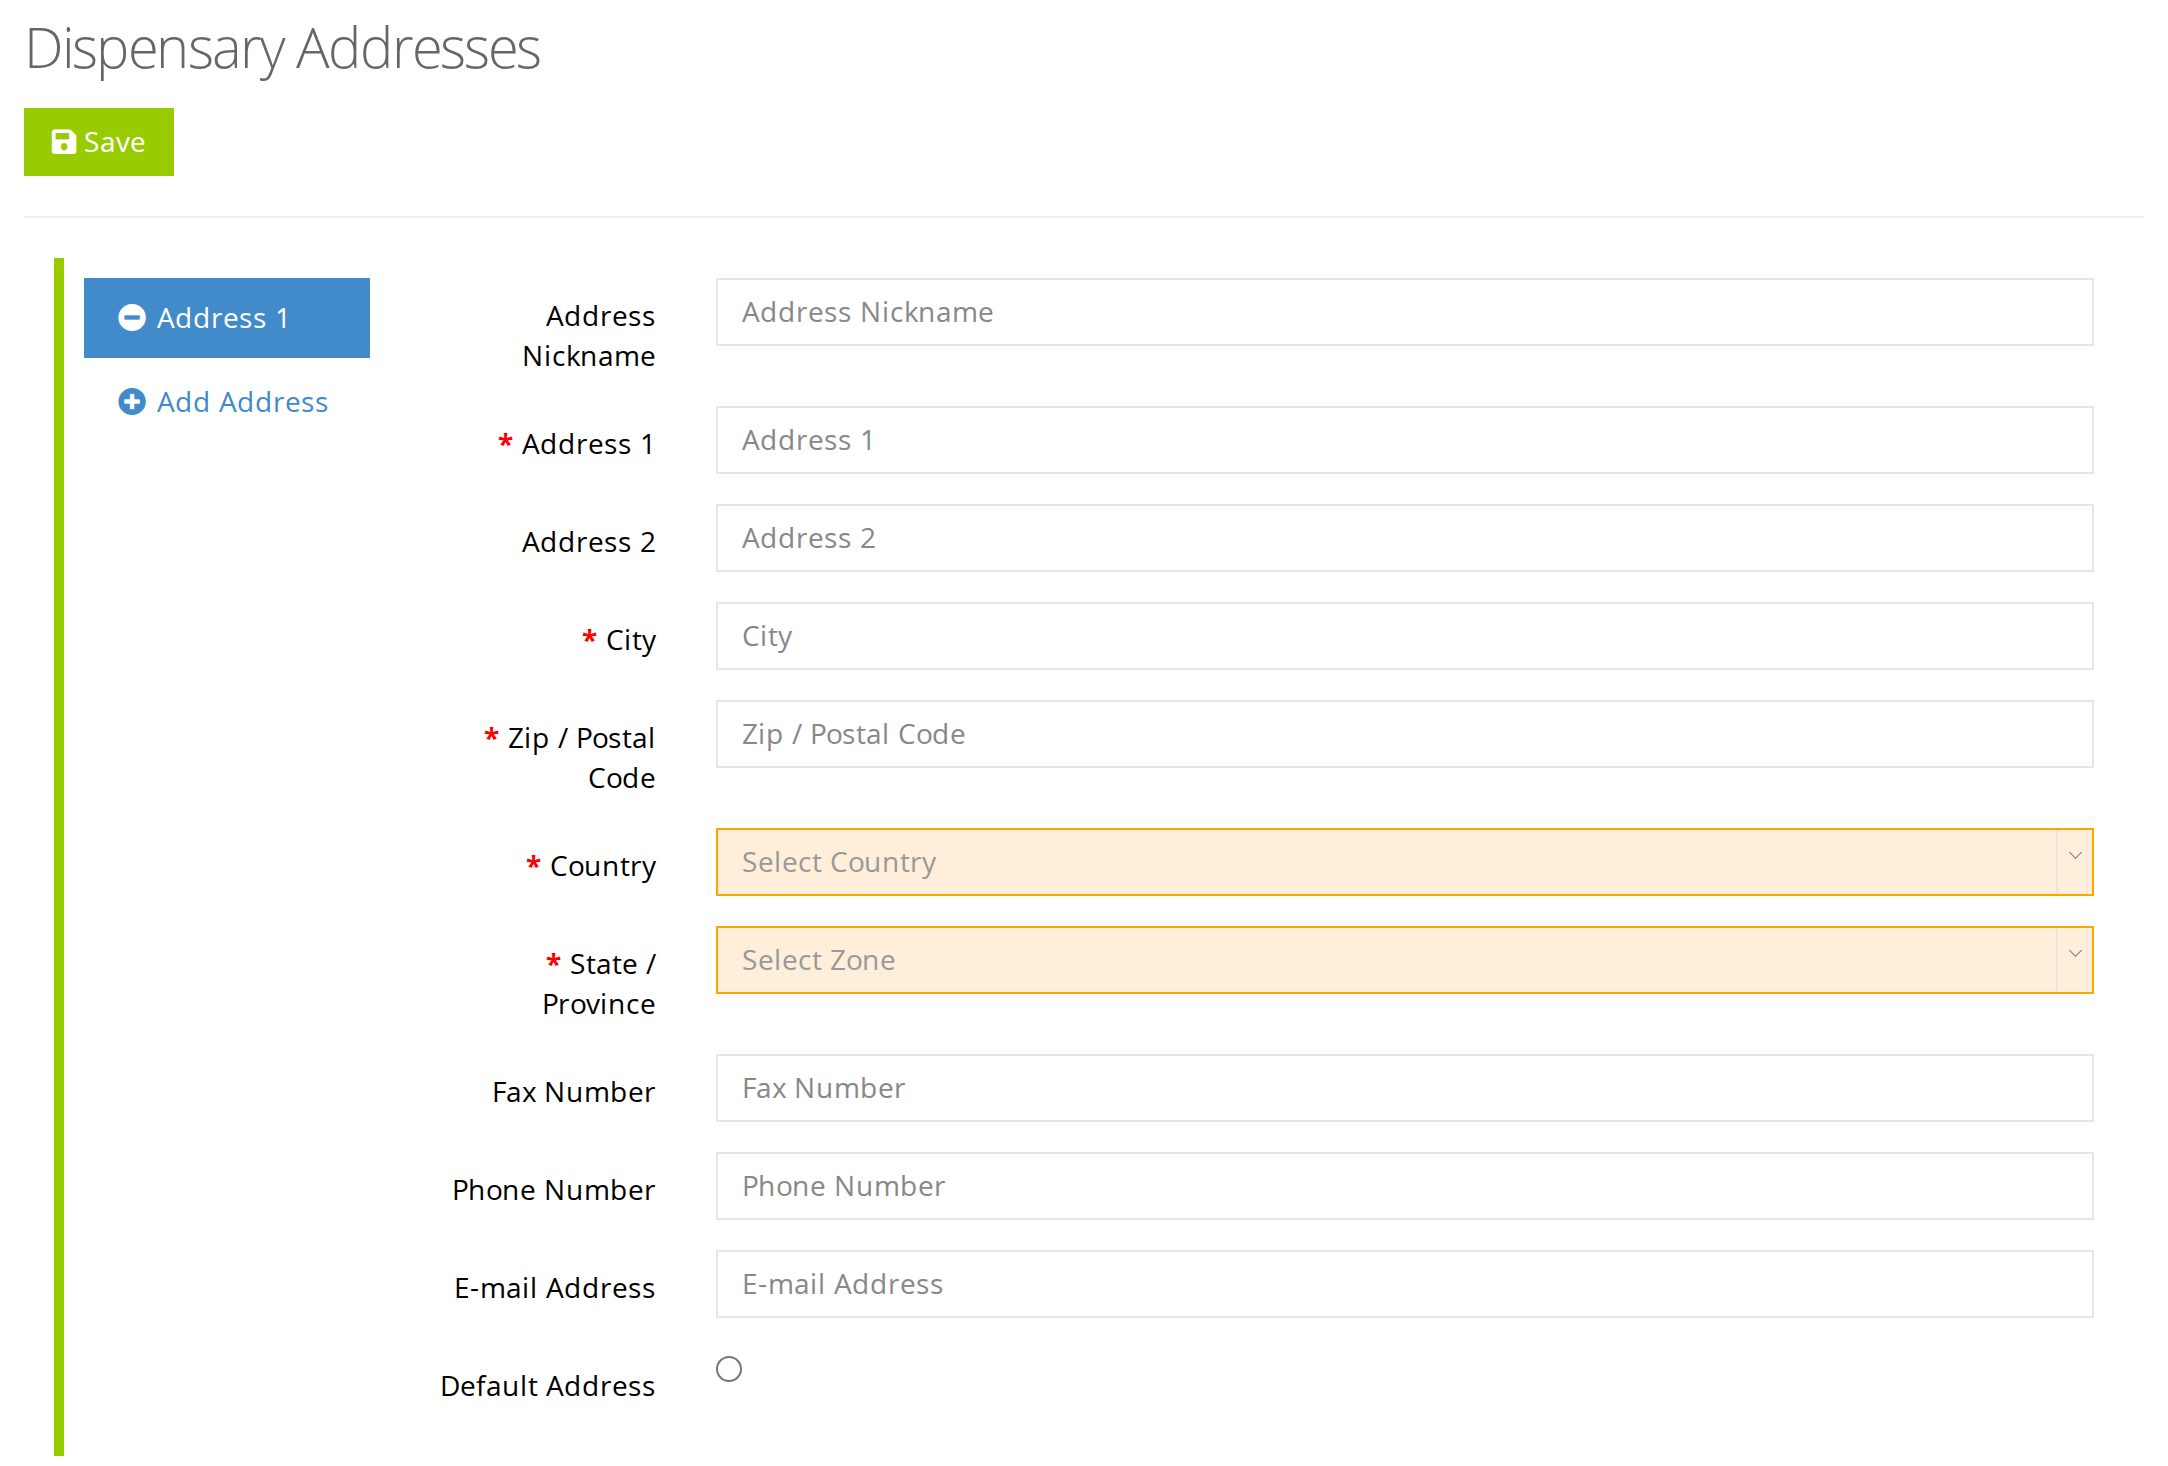
The dispensary's address book. Fields with a red asterisk are required.
The Address Nickname, such as Main clinic, helps you tell addresses apart when you have more than one.
Troubleshooting
A tax is missing from a sale at the front desk
Check the tax rate’s Applies to. When it is Only in these places, your office’s province or state must be one of the places. Then check that your office’s address in Office > Office Details has its province or state set.
A shipped order was charged the wrong tax
A shipped order is taxed at its shipping address. Check the order’s shipping address, then check Applies to on each tax rate in the product’s tax group.
A product was not charged any tax
The product has no tax group. Open the product in the Product List, choose its tax group, and save it. On an invoice you have already made, choose the tax group in the line’s TAX GROUP column and save the invoice.
Related Pages
- The Dispensary: the two kinds of dispensary.
- Dispensary Preferences: the other settings of a dispensary.
- Products: adding products, with their category and tax group.
- Promotions and Discounts: promotions limited to a category.
- Sales Reports: totals by category, and commission.