Quick Start Guide
This walkthrough takes you from never having opened Smart Forms V2 to having a working consent form that a patient can sign in their browser. Total time: about ten minutes. Follow the steps in order; each one builds on the previous.
By the end you’ll have:
- A consent form with two questions (a Yes/No agreement and a signature).
- That form sent to a patient (use a test patient) by email.
- A submitted, signed copy you can view from the patient’s workspace.
Step 1 — Open the Smart Forms V2 page
- From the main navigation menu, choose Smart Forms.
- In the submenu that appears, click SmartForms 2.0.
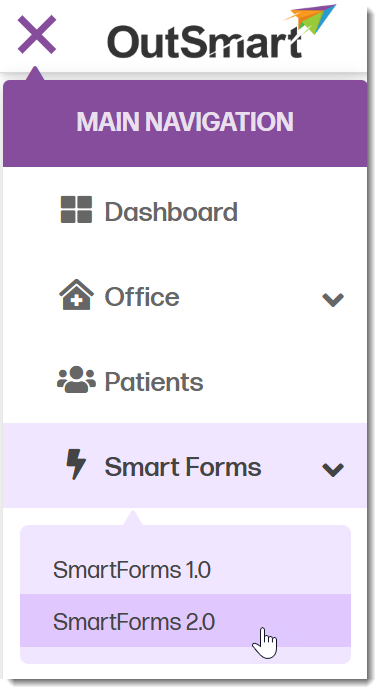
Select SmartForms v2 from the main navigation menu.
You land on the Smart Forms V2 list. If you’ve never used it, the list is empty and a Create Your First Form button is in the middle of the page. If you’ve used it before, you’ll see a green Create New button in the top toolbar instead.
Step 2 — Create a new form
.png)
Click Create New on the Smart Forms header toolbar to create a new form.
- Click Create New (top toolbar)
- The form editor opens with a blank form and a toolbox of question types on the left.
.png)
Click on Add Question to add your first question to your SmartForm.
Your form starts off empty. In the main form area you’ll see a button that says “Add question”. You can click on that, or you can click on one of the question types in the left-hand toolbar to add your first question.
Once you add your first question type, whatever it is, you’ll see two placeholders at the top of the form: Form Title and Form Description. Click each and type:
- Form Title: Consent for Treatment
- Form Description: Please read the statement below carefully, confirm your consent, and sign before your visit.
.png)
After you add a question, you can type in your form title and form description.
The title is what patients will see at the top of the email and at the top of the form when they open it. The description appears just below.
Step 3 — Add the consent question
The first question asks the patient to agree to the consent statement. Whichever question type you’ve just added to your form, at the bottom left there’s a drop-down where you can change the question type.
- Click on that drop-down and choose Yes/No as your question type.
.png)
After you've added a question to the form, you can change the question type by selecting the drop-down at the bottom left and choosing a new question type.
- Click the question’s title and replace it with your consent statement. For example:
I understand that the assessment and treatment I receive at this clinic may include hands-on physical examination, manual therapy, exercise prescription, and clinical recommendations. I have been given the opportunity to ask questions about my care, and I consent to proceed.
.png)
You can use the yes-no question type to create statements that the patient has to answer yes or no to.
- In the right-side panel, click on the General tab and turn on Required. This stops a patient from submitting without confirming consent.
.png)
You can mark a question as required in SmartForms V2 by selecting the question in your form creator and then clicking on the General tab and checkmarking required in the General panel for that question.
The patient will see your statement followed by two buttons: No on the left and Yes on the right.
Step 4 — Add the signature question
The second question captures the patient’s signature.
.png)
You can select the signature question type to add a signature field to SmartForm V2 forms.
- In the toolbox, find Signature under the Misc category.
- Click it (or drag it into the form). A new signature question appears below the Yes/No question.
- Click its title and rename it to something clear, like Patient Signature.
- In the right-side panel General tab, turn on Required.
.png)
A signature field will allow your patients to sign the form. You can mark it as required by clicking on the General tab on the right-hand side of the form creator and checkmarking Required.
The patient will see a box labelled Sign here with a clear button. On a computer they sign with their mouse; on a phone or tablet they sign with their finger.
Step 5 — Preview the form
Before you save, see what your patient will see.
.png)
Previewing your form will give you an idea of what the form will look like to your patients.
- Click Preview in the top toolbar.
- The form renders exactly as it will to a patient. Try filling it out — click Yes, sign in the signature box, and click Complete.
- Click Designer in the top toolbar to return to the editor.
Nothing you typed in Preview is saved or sent anywhere — it’s just a test.
Step 6 — Save the form
Click Save in the top toolbar. The form is now stored in your Smart Forms V2 list and is ready to send.
.png)
Click the Save button at the top of the SmartForm V2 form creator to save your form.
Step 7 — Send the form to a patient
-
Click Forms in the top toolbar to return to the Smart Forms list (or click Save then navigate back).
-
Find your Consent for Treatment form in the list.
-
Click the paper plane icon in the Actions column.
.png)
You can send a form to a patient by clicking the paper airplane icon in the actions column for that form.
-
The Send panel opens.
-
Pick the patient from the dropdown and confirm their email address.
-
Click Send.
.png)
This panel comes up when you want to send a SmartForm V2.0 form to a patient. You need to select the office and the patient and ensure the email address is correct and then click on the blue send form button.
A success message appears. Within a minute or so the patient receives an email from your clinic, with the practitioner’s name in the From field and a Continue to Your Form button.
.png)
A sample of the email a patient may receive when you send them a SmartForm version 2 form. A patient portal is not required to complete SmartForm V2 forms.
Step 8 — What happens on the patient’s side
When the patient clicks the email button, they will be immediately taken to the form. SmartForm V2 forms are compatible with both desktop and mobile devices.
.png)
An example of what a patient will see when they begin to fill out a SmartForm V2.
.png)
SmartForm version two forms are fully mobile compatible. They will adjust to fit the screen size of any mobile device.
- The form opens in their browser. They don’t need to log in.
- They see a header card with your name, photo, and office at the top.
- They read your consent statement, click Yes, sign their name in the signature box, and click Complete.
- A green thank-you screen confirms their submission.
.png)
After a patient has submitted their SmartForm V2, they are presented with a thank you screen.
The form auto-saves as they go — if they get interrupted and close the tab, the next time they open the link their answers are still there.
The patient has 60 days to click the link and open the form. Once they open it, they have 90 days to finish and submit. If they need more time at any stage, you can extend their time from the Assignments tab — see Expiries And Link Timing.
Step 9 — View the signed submission
You’re notified by email when the patient submits — subject line New SmartForm Submission: [Patient Name] — [Form Name].
To view the signed form:
- Open the patient’s record in their workspace.
- Click the Smart Forms tab.
- Find your Consent for Treatment form in the list with a Submitted status.
- Click the eye icon to view the signed form.
.png)
You can find submitted SmartForms in the patient workspace under the SmartForms tab. Click on the 'eye' icon to view the form.
You see the consent statement, the patient’s Yes response, and their signature as a bordered image.
.png)
This is what a sample SmartForms V2 form submission would look like.
That’s it. You’ve built, sent, received, and viewed your first SmartForm V2.
.png)
You can get a guest link for your SmartForms V2 from the send form panel that opens up when you click the paper airplane icon. Click the copy button to get a copy of the link and use it on a button on your website or on social media to allow anyone to fill out the form.
Where to go next
Now that you’ve built one form end to end, you have the full pattern. Use these articles when you want to do more:
- Question Types Reference — every other question type you can add to a form (text, multiple choice, matrix, dynamic panels, and more).
- The Form Editor — full reference for the editor’s toolbar, toolbox categories, and the property panel.
- Sending Smart Forms To Patients — the Get a guest link option, the Send from the patient workspace path, and what to do when you need to resend.
- Sharing Smart Forms With Other Practitioners — let a colleague use your form with their own patients.
- Editing A Smart Form — make changes after you’ve started sending it (and when you can’t, what to do instead).
- Expiries And Link Timing — the two clocks (link-click and fill) and how to extend a patient’s time before or after they run out.